
Hello everybody! I'm sorry it's been a while but high school is busy, stressful, and crazy! So much has happened in these past few weeks: I took my first AP exam (done AP World History YAY!), have been selected as flute/ clarinet section leader (Hannah is also trombone section leader and Marin is administration!! Yay marching band!), and elected corresponding secretary for my church's youth group. I'm really excited for next year because I'm involved in all the things I care about. But next year, there will be a lot of changes. The first being my brother going to college :( I'm oh so very proud of him and I hope he has a great time and learns a lot (same to you Mady!). Because he is going out of state, I wanted to give him something he could always look at and remember home, so why not an outline of good old Maryland itself? This personal and easy DIY makes a great gift because it's personal and functional as a little piece of art for any space, including those tiny dorm rooms.
DIY State Painting

{Le final product}

1. What you'll need:
-newspaper (If you're anything like me, you'll make a mess)
-a pencil (not pictured)
-white and blue acrylic paint (you can choose any colors you desire)
- printout of an outline of Maryland (or any state you pick)
- large and small paint brushes (I have a larger one, medium, and a tiny one)
-a plain piece of paper (extra)
- 15 x 11 1/2 canvas (you can choose any size)

2. Taping
-grab some tape and place the state outline where you would like it in the picture
-if your outline is faint just go over it with some Sharpie then tape it to the back of the canvas

3. Tracing
-take your pencil and go in some sunlight (or a lightbox) and tracing over the state outline
-try and get all of the little indents of the land (of course Maryland is super complex in geography)
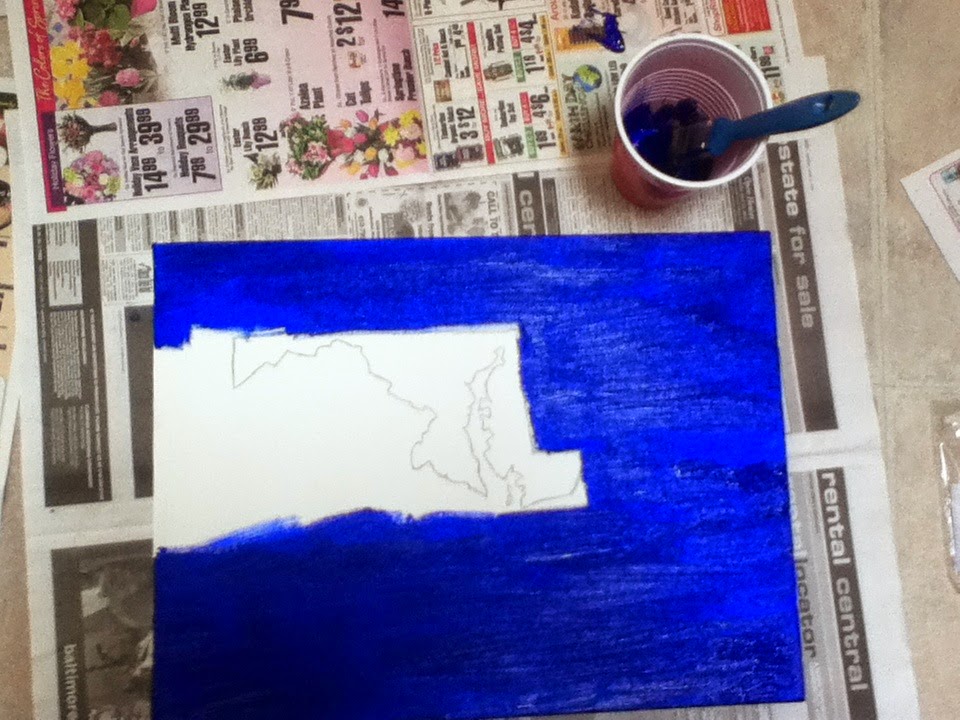
4. Painting the negative space
-take your main color and your big brush and paint a couple coats on, carefully around the state borders
- I ended up mixing some of the blue with white so that I had various shades of blue. I was inspired by the ocean for this:) But I left the borders dark to emphasize the white Maryland (you'll see the paint lighten by the final product)
- you may want to us the tiny brush for the borders if you aren't a very skilled painter, like me


5. Painting Maryland
-this was clearly the hardest part. keep a steady hand and get the borders first
- all of the the little nooks and crannies of Maryland kind of blended together but it still looks like Maryland
- add a few coats if needed
-have clear- cut looking borders so the state looks crisp
*the blue paint hadn't full dried so that's why it looks all blotchy

6. Adding the heart
-I suggest outlining a little heart from where you are from (if it's for yourself) or where the other person is from, in pencil
- if you are a skilled painter, unlike myself, use red acrylic paint to color in a vivid heart, or if you're like me, just improvise and use a red Sharpie
-now look at the heart and state; admire your handy work and it's cuteness

{Baltimore, Maryland}


This project was better than just buying another little gadget for a graduation present and a lot more personal. I have a little message written on the back for him with few word of encouragement as well.
I hope you guys try this project just for fun or as a gift for someone you care about :) Good luck to Mady and all (if any) the seniors who will be going to college!!!!!
xoxo,
ASD
No comments:
Post a Comment
You have feedback? We want to hear it!